Tech Support: Big Toe (Hallux) Conditioning — The Joint Ashtanga Forgot
This is Ashtanga Tech Support — long-form, mechanism-first conditioning pieces for the joint actions the practice quietly demands and rarely trains directly.
Why this matters
The Ashtanga method asks the big toe to do an enormous amount of work and almost never trains it directly.
Every jump-back, every transition through chaturanga, every push-off into a vinyasa loads the first metatarsophalangeal (MTP) joint into end-range extension under bodyweight. Padmasana presses the hallux into the opposite thigh. Kapotasana asks for compliant plantarflexion at the same joint. Sirsasana balance is a continuous micro-negotiation between hallux extensors and flexors. Bhujapidasana asks the hallux to extend while the lesser toes stay relatively neutral — a dissociation most adult feet have lost.
We assume the toe will keep up. Then a student walks in at fifty with a stiff first MTP, can’t push off cleanly, blames the hamstrings, and starts ratcheting harder somewhere up the chain. Collider bias in the meat.
The hallux is a joint. It deserves protocol.
Anatomy in one paragraph
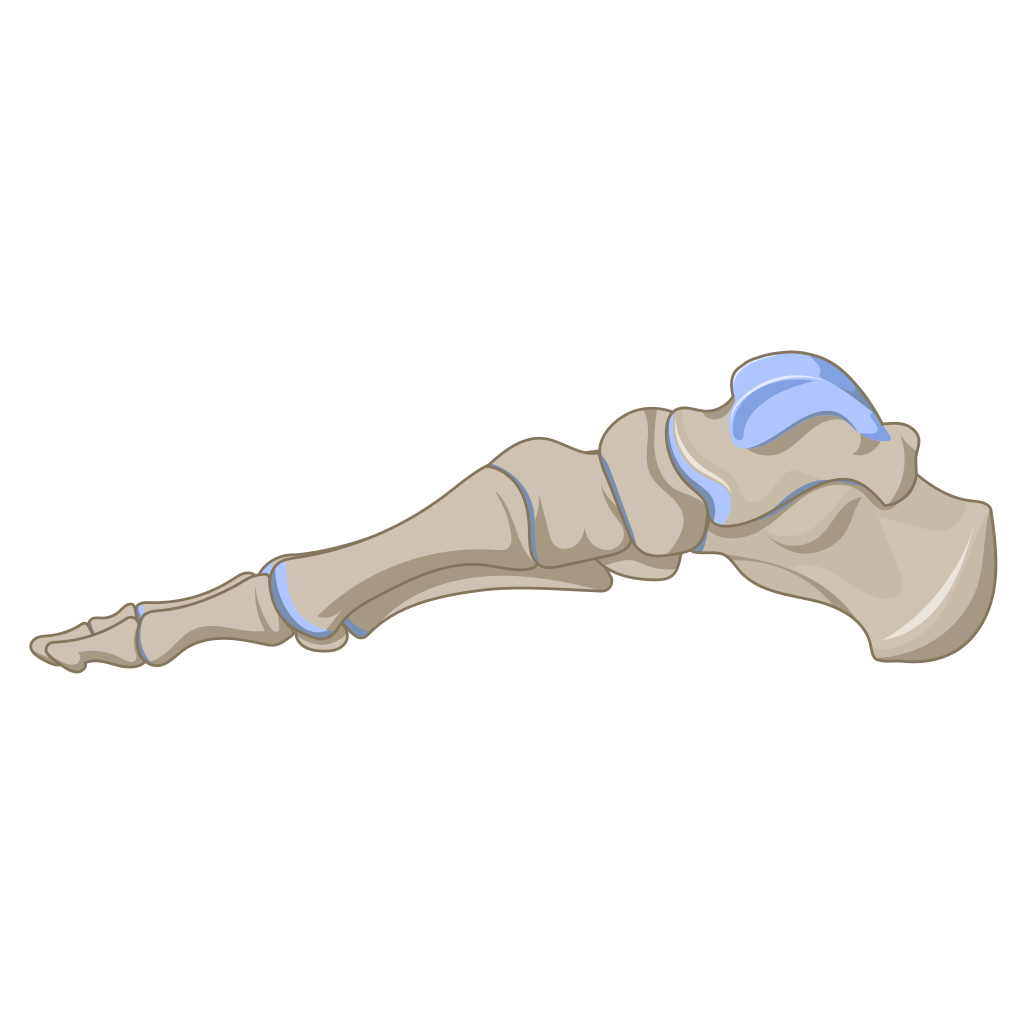
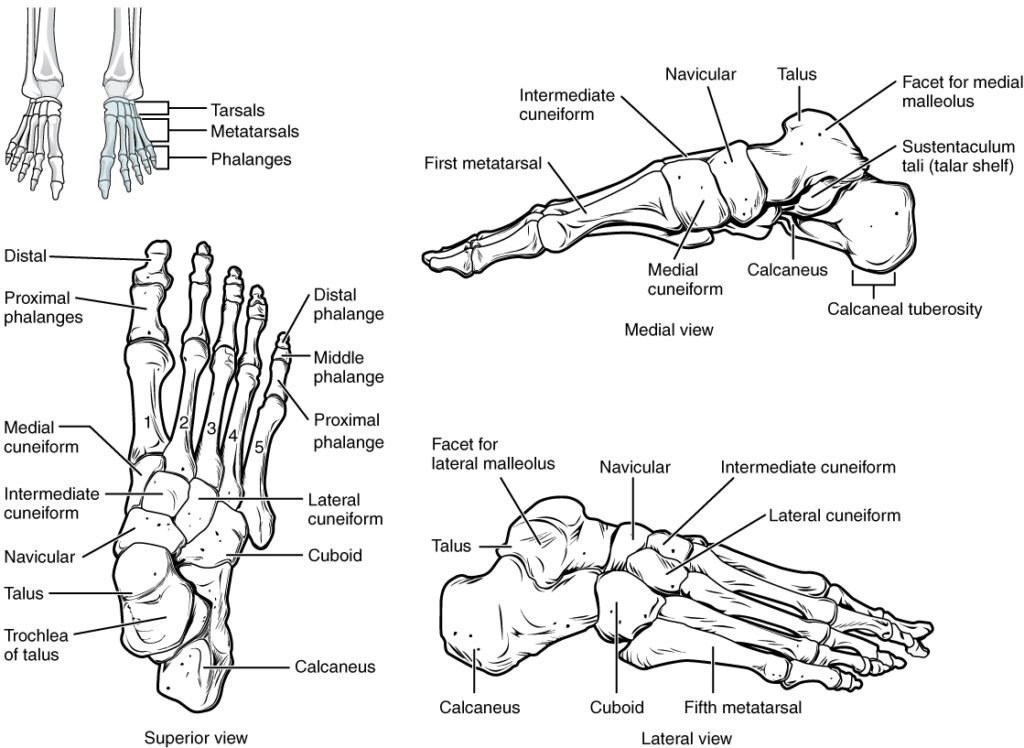
The first MTP is a synovial condyloid joint where the head of the first metatarsal articulates with the base of the proximal phalanx of the great toe. Two sesamoid bones sit beneath it, embedded in the flexor hallucis brevis tendon, acting as a fulcrum during push-off. Functional movement: extension (≈70–90° required for normal gait, more for jump-throughs), flexion (≈30–45°), and small amounts of abduction/adduction. The musculature: flexor hallucis longus and brevis on the plantar side, extensor hallucis longus and brevis dorsally, abductor hallucis medially. Lose capsular health here and the entire propulsive mechanism degrades.
Reference video — Big Toe Extension: Why It Matters & How to Fix It:
Watch:
Assessment: what should the joint be able to do?
Before protocol, baseline. Sit. Bare feet. Test each side independently.
- Active hallux extension — keeping lesser toes relaxed, lift the big toe alone toward the ceiling. Most people can lift it ~30°. The ceiling is closer to 70°.
- Active hallux flexion — keeping lesser toes lifted off the ground, press the big toe down. Most people cannot do this at all on the first attempt.
- Passive hallux extension under load — kneel with toes tucked, sit back onto heels. If you cannot tolerate this, the joint is your limiter.
- CARs quality — perform a slow controlled circle (see protocol below). Note where the line breaks, where the lesser toes start cheating, where compensation enters.
The asymmetry between left and right matters. The asymmetry between active and passive matters more.
Protocol 1: Hallux CARs (daily, non-negotiable)
The opening move. Two minutes, both feet, every morning before practice.
How:
- Seated, foot supported, heel anchored.
- Stabilize the lesser toes with one hand so the hallux moves alone.
- Trace the largest possible circle with the big toe — extension, abduction, flexion, adduction.
- 5 reps each direction. Move at the speed of attention, not the speed of momentum.
- 100% effort means the joint is working, not the body straining.
Reference video — Functional Range Conditioning Toe CARs (official):
Watch:
Reference video — Dr. Andreo Spina, Intrinsic Foot Strengthening:
Watch:
Protocol 2: Hallux Extension PAILs/RAILs
For the practitioner who cannot kneel-sit on tucked toes without pain. For everyone preparing for jump-throughs, jump-backs, and clean chaturanga toe pivots.
Setup: Kneeling, toes tucked, the hallux pressed into the floor in extension. Sit back as far as tolerable without pain — find the first end-range stretch, not the last.
The sequence (one round = ~5 minutes per side or both together):
- Passive stretch — 2 minutes. Breathe. Let the tissue lengthen.
- PAILs contraction — 10 seconds. Press the toes into the floor (toward flexion) at 20% effort. Ramp to 100% over the 10 seconds.
- RAILs contraction — 10 seconds. Now lift the toes away from the floor (deeper into extension) against the floor’s resistance. 100% effort.
- Passive return — sink back into the stretch for 60 seconds.
- Repeat 2–3 rounds.
This is not stretching. This is teaching the nervous system to own a new range.
Reference video — Big Toe PAILs and RAILs (foot-strength oriented):
Watch:
Reference video — FRC Big Toe Extension PAILs/RAILs:
Watch:
Protocol 3: Hallux Flexion PAILs/RAILs
For grip. For Padmasana foot position. For the foot that has forgotten how to participate in standing balance.
Setup: Seated, foot flat on floor. Lift the lesser four toes off the ground while pressing the hallux down (this is the active position — most people will need to start by manually holding the lesser toes up).
The sequence:
- Hold the active flexion position — 30 seconds. Already a workout.
- PAILs — press the hallux harder into the floor at 100% effort, 10 seconds.
- RAILs — try to lift the hallux while keeping the lesser toes lifted, 10 seconds. (You will cramp. That is the point. The intrinsics are waking up.)
- Rest, repeat 2–3 rounds.
Reference video — Foot Intrinsic Strengthening (toe yoga, hallux flexion focus):
Watch:
Protocol 4: Toe Yoga (dissociation)
The neurological prerequisite. If you cannot lift the hallux while keeping the lesser toes down — and lift the lesser toes while keeping the hallux down — your brain has merged the toes into a single unit. This is what we are reversing.
Drill A — Hallux Up, Lessers Down Stand barefoot, feet hip-width. Press all five toes flat. Lift only the big toe. Hold 5 seconds. Lower. 10 reps.
Drill B — Hallux Down, Lessers Up Same setup. Press the big toe down, lift the lesser four. Hold 5 seconds. 10 reps.
Most students will need 4–6 weeks of daily practice before this becomes clean. That is normal. The pathway has been dormant for decades.
Reference video — Big Toe Mobility (Hallux Limitus presentation, but protocols apply broadly):
Watch:
Protocol 5: Loaded Tucked-Toe Sit
The integration drill. Once Protocols 1–4 are tolerable, this is the dose-response.
Kneeling, toes tucked, sit back onto heels. Start with 30 seconds. Build to 2 minutes. This is the position that prepares the foot for the chaturanga-to-up-dog toe pivot, for jump-back push-off, for the sustained load of Mysore practice.
If this position is currently impossible, use Protocols 1–3 for 6 weeks first. There is no shortcut.
Reference video — 3 Exercises for a Stiff Big Toe (mobility set):
Watch:
Where this shows up in the practice
| Pose | Joint Action | What hallux mobility delivers |
|---|---|---|
| Padangusthasana | passive grip via fingers | the ability to hook fingers under the toe at all |
| Surya Namaskara (chaturanga to up-dog pivot) | hallux extension under load | a clean roll-over without smashing the joint |
| Jump-back / jump-through | hallux extension at push-off | propulsion that doesn’t shred the MTP capsule |
| Bhujapidasana | hallux extension with lesser-toe stability | the foot architecture to cross ankles cleanly |
| Sirsasana A/B | both directions, micro-balance | active toe engagement instead of dead-weight feet |
| Pincha Mayurasana | hallux extension in inversion | engaged feet that stabilize the line |
| Salamba Sarvangasana | hallux extension, intrinsic activation | feet that participate in the pose |
| Eka Pada Sirsasana | hallux extension on the standing/grounded foot | base stability |
| Padmasana | hallux flexion, pressing into thigh | the foot position that the pose actually asks for |
| Kapotasana | compliant plantarflexion through the MTP | the foot that doesn’t fight the backbend |
| Tittibhasana | hallux flexion (toes flexion tag) | active foot, not pointed-and-forgotten |
Programming
Beginner / pre-protocol student:
- Hallux CARs daily, 2 minutes
- Toe Yoga drills daily, 5 minutes
- 4 weeks before adding PAILs/RAILs
Established practitioner:
- Hallux CARs daily, 2 minutes (before practice)
- Hallux Extension PAILs/RAILs, 3x/week
- Hallux Flexion PAILs/RAILs, 2x/week
- Loaded Tucked-Toe Sit, daily, building duration
Advanced / teaching: All of the above, plus assessment of every student’s hallux at intake. The amount of intermediate-series problems that resolve when the foot wakes up is non-trivial.
A note on hallux rigidus
If a student presents with frank hallux rigidus — bone-on-bone first MTP arthritis, not just stiffness — the protocols above are modified, not abandoned. CARs remain valuable. Loaded extension may be contraindicated. Send them to a sports-medicine podiatrist for imaging before you load the joint. Then bring them back and condition what is conditionable.
Reference video — Sesamoid mobilization for big-toe pain:
Watch:
The toe is a joint. The body responds to demand. The system works.
Reference video — 5 Best Exercises for Hallux Rigidus:
Watch:
Further Reference
Each video below opens inline — click to expand. The full FRC playlist link is at the bottom.
Watch: FRC Toe CARs (official)
Watch: Dr. Andreo Spina, Intrinsic Foot Strengthening
Watch: Functional Anatomy Seminars FRC playlist
Watch: Big Toe Mobility / Hallux Limitus exercises
Watch: FRC Big Toe Extension PAILs/RAILs
Watch: Foot Intrinsic Strengthening (Toe Yoga)
Functional Range Conditioning® and FRC® are registered trademarks of Functional Anatomy Seminars. Linked videos are referenced for educational purposes; the protocols described here are derived from FRC principles taught through formal certification.
Companion Tech Support: the Lower Limb series
This piece is one of four. The lower limb is a chain — the ankle’s four corners feed the knee’s rotation window, which feeds the hip’s 2×2 matrix, which the hallux finally has to push off from. Train one in isolation and the next one up the chain will quietly compensate. Train the chain.
- The Ankle: Four Corners — The four-corner ankle complex and the FRC protocols the practice quietly demands.
- Hip Adduction × Rotation — The 2×2 matrix of hip adduction with internal and external rotation — Padmasana on one side, Eagle on the other.
- Knee Rotation — Why the knee only rotates when bent, and how the screw-home mechanism protects the rest of the time.
Not sure where to start?
Chat with the intake assistant — tell it about your practice and it’ll point you to what fits.
Talk to the Intake Bot →
Discussion
or explore Student Union